Too Small, and Blurry When You Enlarge It? AI Upscale for the Whole Image or Just One Object, Checked Against the Real Photo
9/23/2026
You want to sell an old camera online, and the only photo you can find is 640 pixels wide, a quick snap from years ago whose original is long gone. Enlarged as a listing photo, the edges go soft, the lettering is unreadable, and buyers scroll past. AI Upscale is made for this: enlarge the whole image 2x, or sharpen just the camera, for 1 credit.
The situation: a product with only a small photo
This is the photo we tested, 640 pixels wide. The camera itself covers just 417 × 384 pixels.

Marketplaces usually want main product images of at least 800 × 800 pixels so buyers can zoom in. Enlarged 2x, the camera is 834 × 768 pixels, just enough.
So that we could compare against real detail, we made this 640 px photo by shrinking a 2400 px original. That lets us put the AI result next to the real high-resolution photo and see whether the detail it adds is right.
Two ways to use it
On the canvas (whole image or an area)
- Upload the photo and click Upscale above the canvas.
- Pick nothing and the whole image is enlarged 2x. Click the camera with Pick (or paint an area) and only what you picked is sharpened by the AI. The picked area shows in blue.
- Before you pay, the bar tells you the result's size, for example "Whole image 640×960 → 1280×1920". Click Upscale · 1 credit; 10–30 seconds later the result is a new version on the timeline.
Just one sharp cut-out object
In an object's preview, click AI upscale · Upscale 2x to get the object cut out on a transparent background, ready for a white-background product shot.
Both cost 1 credit and are refunded automatically if they fail.
Result: plain enlargement vs AI
The same area enlarged 2x. Left: a plain enlargement (Lanczos, the kind of resampling most image viewers and platforms use). Right: AI Upscale.

At a glance they look similar. Zoom in and the difference is obvious. Below is the area around the lens; from left to right: plain enlargement, AI upscale, the real high-resolution photo.

- Edges: the plain version's lens ring is a soft grey band; after AI, the metal edge is crisp and catches the light.
- Texture: the grip ridges on the focus ring and the leatherette on the body are mush in the plain version. AI brings back individual ridges, close to the real photo.
- Lettering: larger text such as "ASPHERICAL LENS" is far clearer after AI than after a plain enlargement.
Against the common approach: why upscaling only part of an image matters
Most AI upscalers have one button: the whole image goes to the AI. The trouble is that the AI "improves" every part of it, including parts you'd rather it left alone.
Here is a blurred patch of the background from the same camera photo, enlarged 2x. Left: the whole image sent to the AI. Right: SegmentLens with only the camera picked and the background enlarged normally.

With the whole image through the AI, the grainy, film-like background turns into smooth plastic bands. With only the camera picked, the AI touches nothing but the blue area, and the rest matches a plain enlargement pixel for pixel (we checked: a difference of 0). The camera is as sharp as in the whole-image run, and there's no visible seam.
This matters in plenty of cases:
- Product photos: only the product gets sharper; props, text and faces in the background don't get odd invented detail.
- Portraits and group shots: sharpen only the person or thing you want, and keep the rest of the photo's natural texture.
- Part of a large image: when a photo is over 2048 pixels and doesn't need enlarging as a whole, pick the one blurry object. The size stays, only that object gets sharper.
Here is a 2400 × 3600 photo with only the camera picked (left: original, right: sharpened, same size):

Less noise, crisper lettering on the lens and ridges on the focus ring, and the average color moves by less than 1%.
What we do differently under the hood
- Enlarge first, cut out after. The usual way is to cut out a transparent image and then enlarge it, which enlarges its jagged edge too. SegmentLens enlarges the original photo around the object and then cuts it out again at the new size along SAM 3's outline, so the edge stays smooth.
- Precise selection with SAM 3. One click picks the whole object, grown by a few pixels by default, with a feathered edge so there's no visible join.
- 2x, once. We tested upscaling twice to 4x: the second pass invents texture the photo never had. So once an image has been upscaled, you can't upscale it again, and you never pay for made-up detail.
The timeline: every upscale is a version
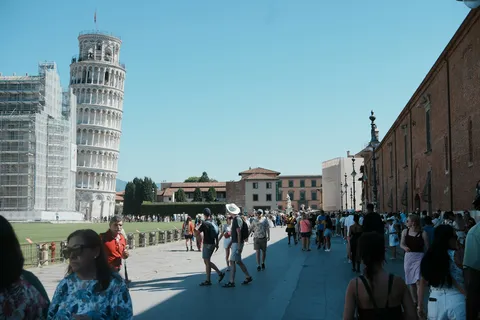
An upscale never overwrites your image; it adds a version to the same timeline AI Erase uses. For example, erase the people in a photo, then upscale the erased version:
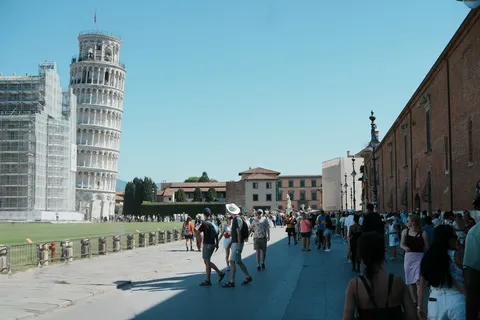
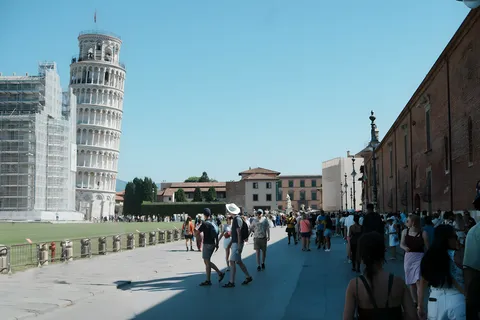

- The original is always there; click any version on the timeline to go back.
- Press and hold "Hold to compare" to see before and after instantly.
- Objects follow the version. After an upscale doubles the size, the outlines of the objects found earlier double too, so you can keep cutting out, erasing and downloading.
- Back after a refresh, or on another device. Versions are saved to your account, so what you paid for is never lost.
What it can't do
Comparing with the real photo, a few things need saying plainly:
- AI adds plausible detail, not real detail. The tiny aperture numbers around the lens got sharper, but a few of them don't match the real photo. Always check small text, model numbers and logos after upscaling.
- The whole image can be upscaled up to 2048 pixels. Larger images are sharp already; to sharpen one object in them, use an area.
- Pick the whole object. If the area's edge cuts across a continuous surface (say, the camera picked but not its strap), the grain differs on either side of the cut. Paint the whole object in.
Good fits
- Reselling: an old item with only one small photo, enlarged for the listing.
- New stock in your shop: the supplier's photo is too small. Sharpen just the product and leave the background as it is.
- Stickers and posters: a small image saved from a screenshot or a chat, enlarged so it prints cleanly.
- Things in old photos: scanned or re-shot prints, with the one object you care about sharpened on its own.
Cost
1 credit each time, whole image, area or single object, refunded automatically if it fails. New accounts get 10 free credits.
Photos from Unsplash (Unsplash License): camera by Eduardo Gorghetto, Pisa by Ali AOUF. All results produced by SegmentLens with no manual retouching.